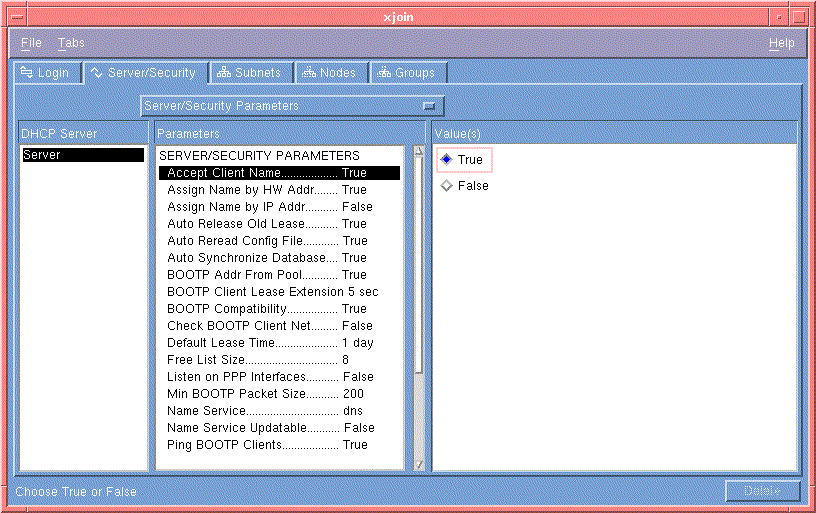
In the Server/Security tab, you can define the configuration of a JOIN server by setting:

To configure JOIN server parameters:
True to have JOIN automatically accept the name a client suggests for itself. However, the server will accept the client-suggested name only if the name does not conflict with the hardware or IP addresses, and if the name is not used elsewhere in the network. The default setting is False.Clients may or may not have an assigned name. If a client does not have an assigned name, one is assigned from the JOIN hostnames list when the client requests an IP address.
True to assign the hostname by the hardware address. The client computer always has the same name, even if its IP address changes. Also, the client must remain in the same domain.
True to assign the hostname by an IP address. The client receives its name from the name service. When a client computer is moved, it can receive a new name from the name service (if this option is selected).
dhcpcap file appears to have changed each and every time a client configuration is required. If the file has changed (as indicated by its time stamp), the server will read and parse it anew. The default is True.
True if you want to automatically delete leases when the client changes its net. For example, if the client received an address on Subnet A, then moved to Subnet B, the leased IP address on Subnet A will be released.
 Some hardware, notably SUN workstations, use a MAC address or client identifier which is the same regardless of the interface being configured. Therefore, two interfaces of a client of this type may appear to the server to be a single client which has changed network. You would probably not want to auto delete leases in this case.
Auto Synchronize Database
Set this parameter to True to flush the server database to disk after each update. This is more reliable in the event of a failure, but slows the server down. The default is False. BOOTP Client Lease Extension
Finite BOOTP lease support. When this parameter is not zero, the server grants FINITE leases to BOOTP clients. BOOTP clients don't know this, so before the server can re-use these leases it must ping the IP address. If a reply is heard the server automatically extends the lease by this time interval (in seconds).
 The original lease conferred on a BOOTP client is determined by the
 dhcpcap file, which need not be the same as this extension. Also, this capability is only relevant to BOOTP clients which are dynamically addressed (BOOTP_addr_from_pool set to True). The default value is 0.
BOOTP Addr From Pool
Specifies if the server can permanently assign an IP address from its free pool to a BOOTP client in the event that no permanent binding exists in dhcpcap. Normally the JOIN server can only service BOOTP clients for which such a binding pre-exists. This option is valid only if support_BOOTP is enabled.
| False | do not pick an address from a pool |
|---|---|
| True | pick an address from a pool |
True to have the server also act as a BOOTP server servicing BOOTP clients. The default is False.
| Default minimum packet size | 300 bytes |
|---|
 Macintosh DHCP client from an early version of Open Transport sends packets smaller than the minimum 300 bytes. To compensate, set this parameter to 200 bytes.
| Digital Unix | /etc/hosts, DNS, and NIS |
|---|---|
| HP-UX | /etc/hosts, DNS, and NIS |
| Solaris | /etc/hosts, DNS, NIS, and NIS+ |
| SunOS | /etc/hosts, DNS, NIS |
True to have JOIN automatically update the name service with the assigned IP addresses and hostnames. The following table describes name services that can be updated for each platform.
| Digital Unix | /etc/hosts |
|---|---|
| HP-UX 9 | /etc/hosts |
| HP-UX 9 | /etc/hosts and NIS |
| Solaris | /etc/hosts, NIS and NIS+ |
| SunOS | /etc/hosts and NIS |
 DNS cannot be updated by JOIN.
Ping BOOTP Clients
Before an IP address is given to a BOOTP client the server first checks to see whether or not it is in use by sending an ICMP echo. If a reply is received, an error is logged. If the address was from the dynamic pool it will be marked unavailable, and a new address selected from the pool. If the address was statically configured the server refuses to configure the client. Ping Timeout
Enter the duration to wait before concluding no other host is using the IP address. After the time-out, the ping command stops checking. Provisional Time To Live
This parameter serves two functions:
True. Once the server sends out a BOOTP reply, it will not send out another BOOTP reply to this BOOTP client until the blackout period has expired.
| False | do not reply (presumably the server will hear the client broadcast directly) |
|---|---|
| True | reply regardless of the location of the relay agent |
True to have DHCP information provided to only those hosts which have a known MAC address. To "register" a known MAC address client, use Preload MAC Addresses from the Server/Security tab. Choose False to have DHCP information provided to all clients. The default is False.For more information, see "Preload MAC Addresses".
Send Options In DHCP Offer
Specifies if the server will send a complete configuration to a DHCP client. Resolving a client configuration can be time consuming and, in a multi-server environment, the client may select another server. The default is False.
| False | send a minimum configuration |
|---|---|
| True | send a complete configuration |
True, the server will use the client's MAC address as the client ID. Using the MAC address as the client identifier is the same method used by BOOTP to uniquely identify a client. For more information on client ID, refer to "The Concept of Client ID".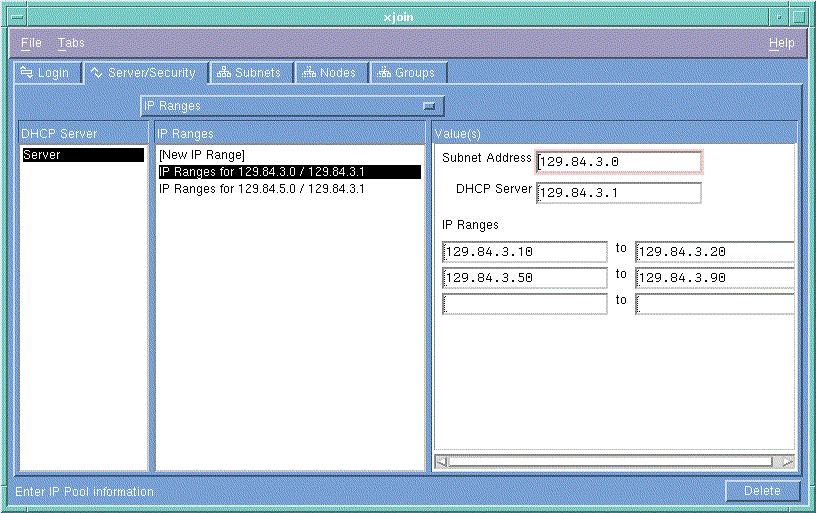
Use the IP Ranges parameters to specify the IP addresses available for assignment to clients.
 If your network is subnetted, you must reflect that information properly in the
 netmasks file.
IP Ranges.
[New IP Range].
IP Ranges Parameters
Subnet Address
Subnets are logical subdivisions of a single TCP/IP network. The subnet IP address identifies one segment of the network. As the number of networks grows, routing IP addresses can get very complicated. Using subnets allows more flexibility when assigning and administering network addresses. DHCP Server
Enter the IP address or name of the JOIN DHCP server. For example, 128.174.139.10. More than one JOIN server can be configured on a local area network (LAN) or subnet. IP Ranges
The IP Address Range is the group of unique IP addresses that will be assigned to clients on the selected subnet. Using the above subnet IP address as an example, an administrator can configure a range of 100 clients from 128.174.139.20 to 128.174.139.120. Secondary Address
Generally, the DHCP server offers an IP address based on the subnet address of the interface from which the server receives the DHCP request. In the case where the client and the server reside on two different subnets, a relay agent forwards the packets between them. The server uses the address of the interface from which the relay agent receives the DHCP request to identify the correct subnet. This helps to ensure that a client on Subnet A gets an address within Subnet A.
In the example above, there are three logical subnets connected to a single port at the router: 129.72.3.0, 129.72.4.0 and 129.72.5.0. The primary interface address of the router is 129.72.3.1.
The router also has two secondary interface addresses: 129.72.4.1 and 129.72.5.1. The DHCP server (129.72.8.33) sits on a different subnet, connected to the router at a different port.
The server has configured three different pools of addresses, one for each subnet:
| Subnet | Range |
|---|---|
| 129.72.3.0 | 129.72.3.10-129.72.3.50 |
| 129.72.4.0 | 129.72.4.20-129.72.4.80 |
| 129.72.5.0 | 129.72.5.35-129.72.5.88 |
When the router receives a DHCP request from the client, it is going to stamp its primary interface address (129.72.3.1) into the packet before forwarding it to the server. Upon receiving the request, the server will assign an address from the primary range (129.72.3.10-129.72.3.50). When that pool is exhausted, the server will then give an IP address from the second range (129.72.4.20-129.72.4.80) and then the third range (129.72.5.35-129.72.5.88). Even though the IP address in the second and third pools are not on the same subnet as 129.72.3.0, the server will assign addresses from those IP pools. This allows IP addresses from different subnets to be given through the same interface.
Configuring Parameters for Secondary Nets
Since secondary nets reside on different logical networks, they typically do not share the same set of configuration parameters. For example, in the previous network environment, the default router for each secondary net should be different. In addition, each secondary net may have its own DNS server or use a different subnet mask. As a result, each secondary net should have its own set of configuration parameters. This is done the same way parameters are defined for subnets using the Subnet tab in the xjoin GUI, regardless of whether the subnet is a primary or secondary network. In the above sample environment, the user should define three subnet configuration parameters for subnet3, subnet4 and subnet5. Supporting BOOTP clients for Secondary Nets
Traditionally, the BOOTP protocol is used to provide static, one-to-one MAC address to IP address mapping. Using static MAC-to-IP mapping, the use of secondary networks should have no effect on IP address assignment. Each MAC address has a predefined, unique IP address. However, the JOIN server has a feature where an IP address can be allocated from an IP pool for a BOOTP client. This provides dynamic IP mapping for BOOTP clients. This feature is enabled by setting the Server/Security parameter, BOOTP Addr from Pool to True. If you want to use this feature for secondary networks, you will need to configure the IP address ranges for secondary nets the same way you do for DHCP clients. The server will give out IP addresses to the BOOTP clients from one range to another after exhausting the preceding range. Configuring Hostnames
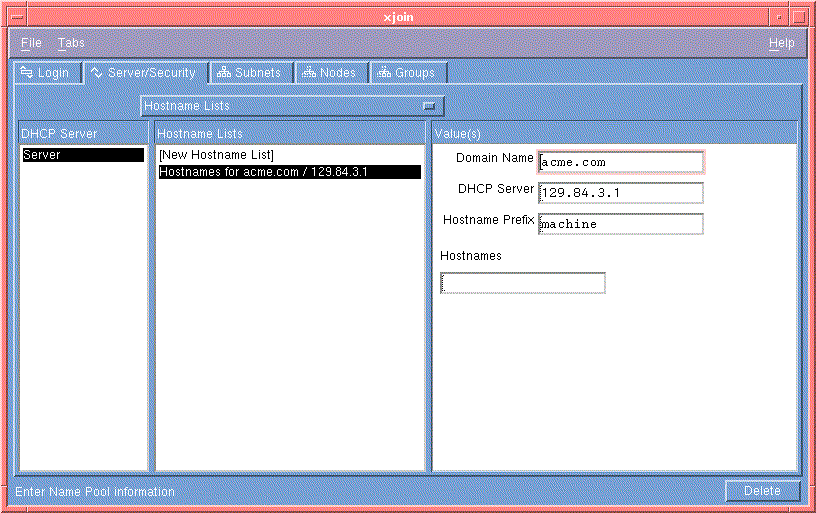
 Follow the instructions in this section only if Accept Client Name is set to
 False.
Hostname Lists, then select [New Hostname List].
school.edu, company.com, city.gov, and so on.
The hostname prefix is used when a computer requests a hostname, but no hostname is available.
For example, if the names in the Hostname list box have all been assigned and the hostname prefix is Mariner, the next two computers to request hostnames would receive Mariner1 and Mariner2 as their hostnames.
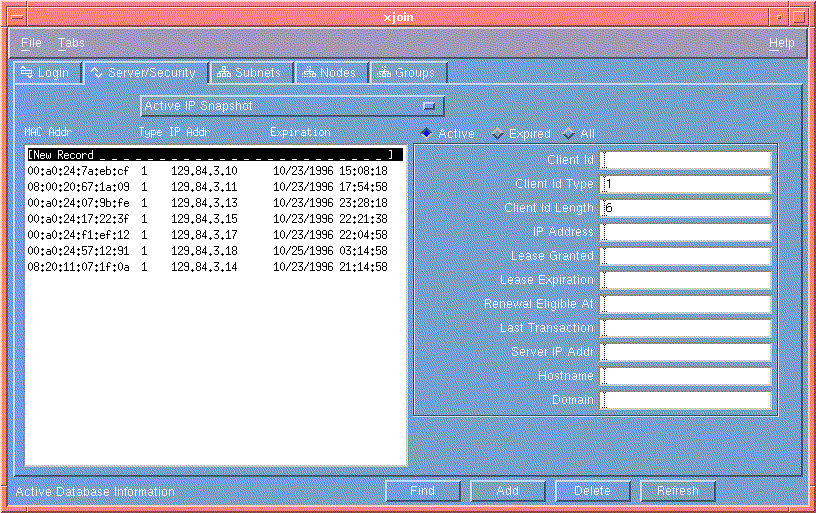
You can use the Active IP Snapshot window to:
Changes made to the database take effect immediately.
 Make sure that the IP address you specify does not belong to any pool of IP addresses configured in IP Range. Otherwise, the IP address could be released and used by other clients (MAC address).
Delete.Changes to the database take effect immediately.
Import.
OK.
Refresh. The current status of the database is shown.
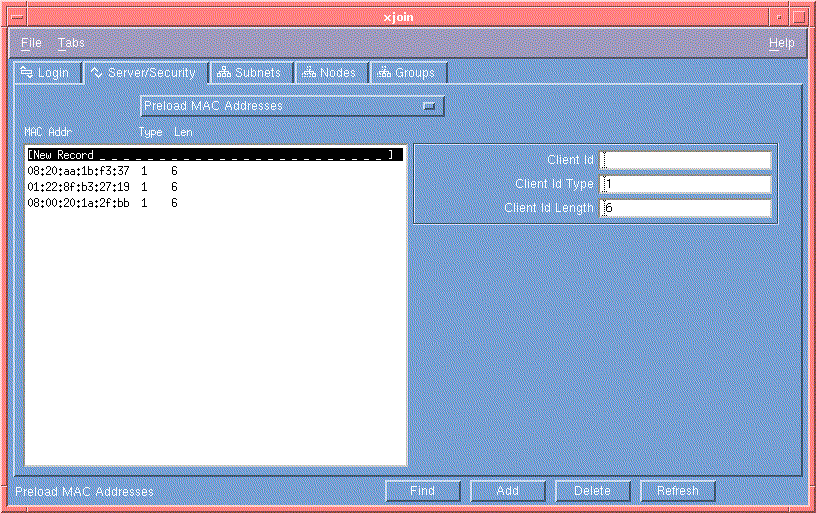
Use the Preload MAC Addresses window to restrict assignment of IP addresses. To enable this security measure, set
Restrict to known MAC addr to True in the Server/Security Parameters window. Dictate what clients get configuration information from the server by manually entering the desired MAC addresses. All other client DHCP requests will be ignored.
[New Record].
Add.
Delete.
Find.
OK.
Import.
OK.
Refresh. The current status of the database is shown.